Tombs of Amascut: Difference between revisions
Jump to navigation
Jump to search
No edit summary |
No edit summary Tags: Manual revert Reverted |
||
| Line 1: | Line 1: | ||
= Tombs of Amascut (TOA) = | = Tombs of Amascut (TOA) Guide = | ||
== Introduction == | == Introduction == | ||
Tombs of Amascut is a high-level raid, doable in groups but not recommended for solo unless you have near-max gear. | |||
=== Getting Started === | |||
* '''Access:''' Use command ::toa or navigate through Spellbook → Minigames → Tombs of Amascut | |||
* '''Requirements:''' Both melee and ranged combat styles | |||
* '''Recommended gear:''' At least Void/Crystal armor and a solid melee weapon (Rapier/Tentacle whip) | |||
* '''Party formation:''' You must create or join a party before entering (similar to other raids) | |||
=== Raid Structure === | |||
Upon entering, you'll find 5 entrances: | |||
* Path of Het | * Path of Het (Akkha) | ||
* Path of Crondis | * Path of Crondis (Zebak) | ||
* Path of Scabaras | * Path of Scabaras (Kephri) | ||
* Path of Apmeken | * Path of Apmeken (Ba-Ba) | ||
* The Wardens (final boss, accessible after completing all other paths) | |||
'''Important:''' After each boss fight, a ghost will appear. Right-click it and select "proceed" to continue. | |||
[[File:toa_room.jpg|center|500px|TOA Entrance Room]] | |||
== Boss Guides == | |||
== Path of Het | === Path of Het - Akkha === | ||
'''Combat style | {| class="wikitable" style="float:right; margin-left:10px; width:300px;" | ||
''' | ! colspan="2" style="text-align:center; background:#eaecf0;" | Akkha | ||
|- | |||
| '''Combat style''' || Melee | |||
|- | |||
| '''Prayer''' || Protect from Melee | |||
|- | |||
| '''Mechanics''' || Floor symbol patterns | |||
|} | |||
This fight | This fight is relatively straightforward: | ||
* Keep your Protect from Melee prayer active | |||
* Deal damage normally until his special attack | |||
'''Special Attack:''' Akkha slams his spear into the ground, causing four symbols to light up one after another. Stand on each symbol in the correct order to avoid damage. | |||
[[File:akkha_2.gif]] | [[File:akkha_2.gif|center|500px|Akkha's symbol pattern attack]] | ||
== Path of Crondis | === Path of Crondis - Zebak === | ||
'''Combat style | {| class="wikitable" style="float:right; margin-left:10px; width:300px;" | ||
''' | ! colspan="2" style="text-align:center; background:#eaecf0;" | Zebak | ||
|- | |||
| '''Combat style''' || Ranged | |||
|- | |||
| '''Prayer''' || Switch between Protect from Magic and Ranged | |||
|- | |||
| '''Mechanics''' || Dual-hit attacks, poison pools | |||
|} | |||
Key mechanics to watch for: | |||
* Attacks hit TWICE - first when exploding in the middle, then when the projectile reaches you | |||
* Switch prayers according to his attack style | |||
* Avoid standing in poison pools | |||
[[File:croc.gif|400px]] [[File:croc_2.gif|400px]] | |||
=== Path of Scabaras - Kephri === | |||
{| class="wikitable" style="float:right; margin-left:10px; width:300px;" | |||
! colspan="2" style="text-align:center; background:#eaecf0;" | Kephri | |||
|- | |||
| '''Combat style''' || Melee | |||
|- | |||
| '''Prayer''' || None required | |||
|- | |||
| '''Mechanics''' || Area-of-effect attacks, falling boulders | |||
|} | |||
This fight is more complicated with multiple attack patterns to dodge: | |||
''' | * '''Single orange ball:''' Sidestep to avoid 35 damage | ||
''' | * '''Orange explosion ball:''' Leaves an outgoing explosion dealing 35 damage | ||
* '''Falling boulders:''' Incapacitate you and deal 45 damage | |||
All attacks show their landing area before impact, giving you time to move out of the way. | |||
[[File:kephri_1.gif|400px]] [[File:kephri_2.gif|400px]] | |||
=== Path of Apmeken - Ba-Ba === | |||
{| class="wikitable" style="float:right; margin-left:10px; width:300px;" | |||
! colspan="2" style="text-align:center; background:#eaecf0;" | Ba-Ba | |||
|- | |||
| '''Combat style''' || Melee | |||
|- | |||
| '''Prayer''' || Switch between Protect from Melee and Ranged | |||
|- | |||
| '''Mechanics''' || Falling boulders, ranged attacks, ground hazards | |||
|} | |||
Ba-Ba has several different attacks: | |||
* '''Falling boulders:''' Deal ~40 damage but can be avoided by stepping aside | |||
* '''Thrown boulder:''' Switch from Protect from Melee to Ranged to negate damage | |||
* '''Red projectiles from sarcophagus:''' Land randomly - track them to avoid standing where they'll land | |||
' | [[File:throwing_baba.gif|center|300px|Ba-Ba's boulder throw]] [[File:red_orbs.gif|center|300px|Red projectiles pattern]] [[File:baba_boulders.gif|center|300px|Falling boulders attack]] | ||
== The Wardens == | |||
The final encounter consists of multiple phases. | |||
=== Phase 1 - Obelisk === | === Phase 1 - Obelisk === | ||
{| cl | |||
Revision as of 18:08, 6 March 2025
Tombs of Amascut (TOA) Guide
Introduction
Tombs of Amascut is a high-level raid, doable in groups but not recommended for solo unless you have near-max gear.
Getting Started
- Access: Use command ::toa or navigate through Spellbook → Minigames → Tombs of Amascut
- Requirements: Both melee and ranged combat styles
- Recommended gear: At least Void/Crystal armor and a solid melee weapon (Rapier/Tentacle whip)
- Party formation: You must create or join a party before entering (similar to other raids)
Raid Structure
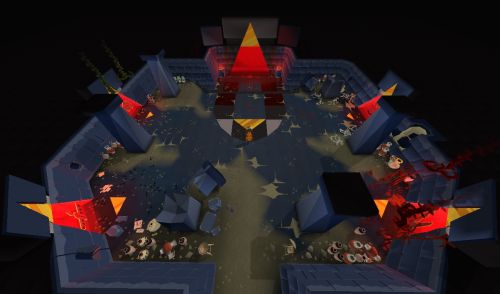
Upon entering, you'll find 5 entrances:
- Path of Het (Akkha)
- Path of Crondis (Zebak)
- Path of Scabaras (Kephri)
- Path of Apmeken (Ba-Ba)
- The Wardens (final boss, accessible after completing all other paths)
Important: After each boss fight, a ghost will appear. Right-click it and select "proceed" to continue.
Boss Guides
Path of Het - Akkha
| Akkha | |
|---|---|
| Combat style | Melee |
| Prayer | Protect from Melee |
| Mechanics | Floor symbol patterns |
This fight is relatively straightforward:
- Keep your Protect from Melee prayer active
- Deal damage normally until his special attack
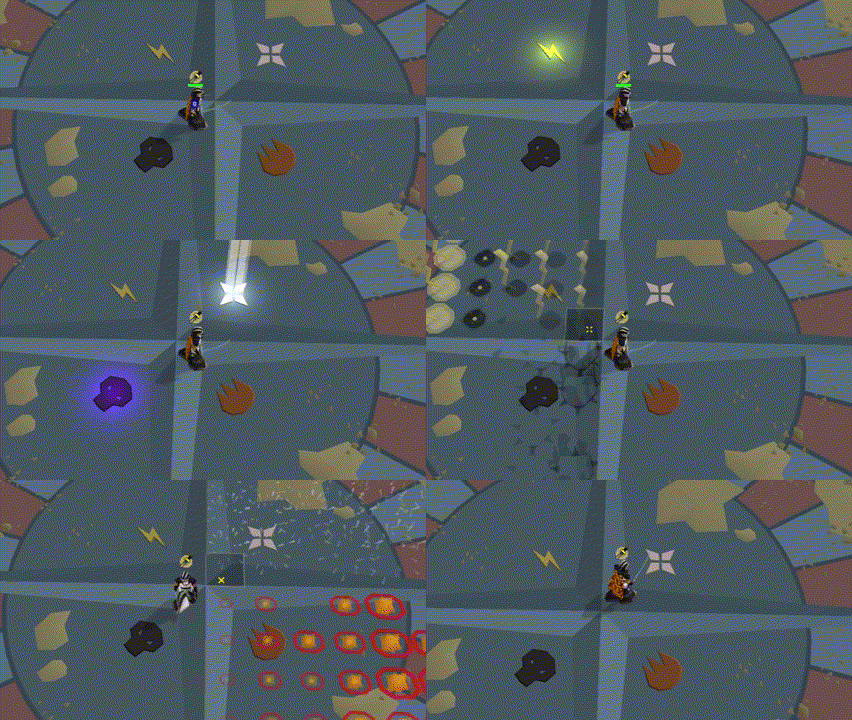
Special Attack: Akkha slams his spear into the ground, causing four symbols to light up one after another. Stand on each symbol in the correct order to avoid damage.
Path of Crondis - Zebak
| Zebak | |
|---|---|
| Combat style | Ranged |
| Prayer | Switch between Protect from Magic and Ranged |
| Mechanics | Dual-hit attacks, poison pools |
Key mechanics to watch for:
- Attacks hit TWICE - first when exploding in the middle, then when the projectile reaches you
- Switch prayers according to his attack style
- Avoid standing in poison pools
Path of Scabaras - Kephri
| Kephri | |
|---|---|
| Combat style | Melee |
| Prayer | None required |
| Mechanics | Area-of-effect attacks, falling boulders |
This fight is more complicated with multiple attack patterns to dodge:
- Single orange ball: Sidestep to avoid 35 damage
- Orange explosion ball: Leaves an outgoing explosion dealing 35 damage
- Falling boulders: Incapacitate you and deal 45 damage
All attacks show their landing area before impact, giving you time to move out of the way.
Path of Apmeken - Ba-Ba
| Ba-Ba | |
|---|---|
| Combat style | Melee |
| Prayer | Switch between Protect from Melee and Ranged |
| Mechanics | Falling boulders, ranged attacks, ground hazards |
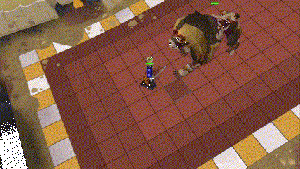
Ba-Ba has several different attacks:
- Falling boulders: Deal ~40 damage but can be avoided by stepping aside
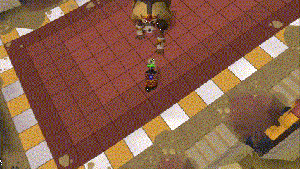
- Thrown boulder: Switch from Protect from Melee to Ranged to negate damage
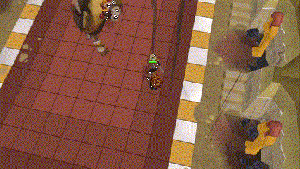
- Red projectiles from sarcophagus: Land randomly - track them to avoid standing where they'll land
The Wardens
The final encounter consists of multiple phases.


